For Seal of Yellow, light the red and green flames. For Seal of Purple, light the red and blue flames. The colors describe the combination required; you do not need to find a separate yellow flame.
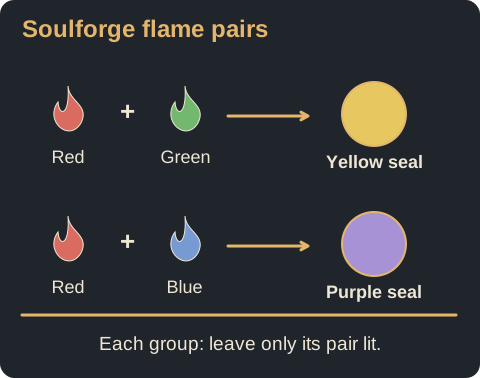
Set the two flame groups
| Seal label | Flames to leave lit |
|---|---|
| Yellow | Red and green |
| Purple | Red and blue |
Work with each seal’s group of flames separately. If you have turned on extra flames while experimenting, turn those extras off so each group matches its pair. Keep the seal label and the lit flames together when checking your result.
This is the Soulforge colored-flame puzzle, also described by players as the Silent Riddles room. Its solution opens access to a chest.
The chest is not the eight-key gate
The main route onward uses a separate gate requiring eight sphere keys. The seal chest is optional, so solving the colors does not replace the keys from the garden puzzles.
If you are standing at the large locked route gate after collecting this chest, follow the garden paths for its keys. Repeatedly switching the colored flames will not supply those eight keys.
Carry supplies for other puzzles
Keep ordinary objects until you know whether a nearby clue needs them. Later Soulforge puzzles use items as offerings or weights. The Trial of Dexterity specifically requires throwing a light object onto a distant plate, so retain something suitable rather than selling every spare object on the way.
For an earlier statue room, Gravewood Crypt has leaf-marked targets and a reset control. It does not use this flame-color rule.
Sources
- Fahad Suleman’s Soulforge walkthroughThe colored seals use red plus green for yellow and red plus blue for purple; the reward is a chest.
- Player asking about the two sealsThe Silent Riddles discussion identifies Seal of Yellow and Seal of Purple as a point of confusion.